Affiliate Disclosure: As an Amazon Associate, we earn from qualifying purchases. This does not affect the price you pay.
Range hood installation instructions vary enormously in quality, and the difference decides whether fitting one is an afternoon or a weekend. Some manufacturers publish a video walkthrough. Some include a cardboard template for marking the fixing holes. Others supply a folded sheet of diagrams and leave you to work it out.
Two facts shape the whole job. First, the hood type determines the difficulty: under-cabinet hoods borrow their support from the cabinet above and are the easiest, wall-mount chimneys carry their own weight and need the fixings right, and inserts have to be positioned and connected inside a cabinet, which is fiddliest of all.
Second, the electrical connection determines whether you need a professional. A hood with a plug fitted needs only a socket. A hard-wired hood needs a supply brought to it, and that is an electrician’s job in most cases regardless of how clear the instructions are.
These ten hoods are ranked on how well the manufacturer documents and equips the installation — videos, templates, included ducting, plugs rather than flying leads — followed by a step-by-step walkthrough of the job itself.
Our Quick Picks
 Best for DIYBroan-NuTone PM300SS
Broan supplies EZ1 clips and states outright that the insert is designed for DIYers as well as professionals.
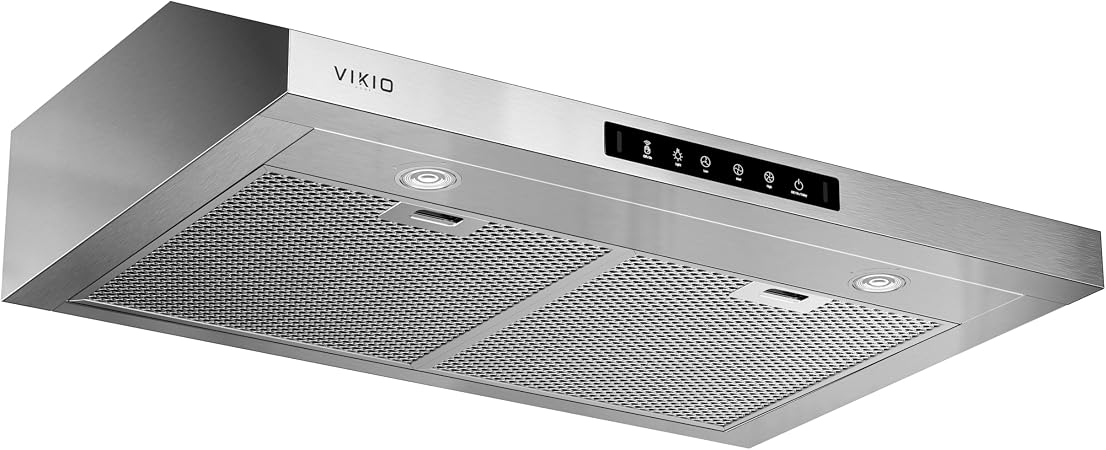 Best Install KitVIKIO HOME 30″ UC
The only hood here that ships a cardboard positioning template for marking the fixing holes.
 Most Complete BoxCOMFEE’ F13 30″
The most complete package here — lamp holder, screw pack, baffle and both filters all in the box.
At a Glance
Range Hoods Compared by Installation
Ten hoods ranked on documentation, included fittings and how much of the job you can do yourself.
| # | Model | Type | Install Method | In the Box | Documentation | Standout | Main Drawback | Check Price |
|---|---|---|---|---|---|---|---|---|
| 1 |
 Broan-NuTone PM300SS Broan-NuTone PM300SS |
Insert | EZ1 clips | Clips + liner extension | Broan manuals | Designed for DIY fitting | Wall remote sold separately | View on Amazon |
| 2 |
 VIKIO HOME 30″ UC VIKIO HOME 30″ UC |
Under cabinet | Template supplied | Cardboard positioning template | Full parts list published | Marking template included | No carbon filter in the box | View on Amazon |
| 3 |
 FIREGAS Insert 30″ FIREGAS Insert 30″ |
Insert | Manual + video | Plug fitted, 3-prong | Installation video published | Video walkthrough for the hardest type | Needs a cabinet to sit in | View on Amazon |
| 4 |
 FIREGAS 30″ 300 CFM FIREGAS 30″ 300 CFM |
Under cabinet | Manual + video | Recirculation sheet + outlet | Video and manual both | Slim body eases fitting | Hard-wired, not plug-fitted | View on Amazon |
| 5 |
 COMFEE’ F13 30″ COMFEE’ F13 30″ |
Under cabinet | All small parts | Lamp holder, screws, baffle | Filter change video | Nothing else to buy | 200 CFM only | View on Amazon |
| 6 |
 VIKIO HOME 30″ Wall VIKIO HOME 30″ Wall |
Wall mount | Published video | Dishwasher-safe filters | Wall-mount install video | Video for the hardest mount | 41 inches of height needed | View on Amazon |
| 7 |
 Zomagas 24″ Wall Zomagas 24″ Wall |
Wall mount | 6-inch pipe supplied | Exhaust pipe in the box | Named filter parts | Ducting included, uniquely | 36.3 inches tall | View on Amazon |
| 8 |
 COSMO Vista 30″ COSMO Vista 30″ |
Wall mount | Adjustable chimney | Adjusts 25.6 to 39.4 in | 2-year parts, US support | Height adjusts to the room | Soft touch, not buttons | View on Amazon |
| 9 |
 FIREGAS 36″ 300 CFM FIREGAS 36″ 300 CFM |
Under cabinet | Plug fitted | Adaptor, outlet, vent cover | 1-year warranty | Plugs in, no wiring | 300 CFM across 36 inches | View on Amazon |
| 10 |
 magicin 30″ Convertible magicin 30″ Convertible |
Under cabinet | Quick setup | Clear instructions | Setup speed emphasised | Straight replacement job | Only 12 ratings | View on Amazon |
Included parts and documentation are as stated in each manufacturer’s listing at the time of writing. Broan specifies at least 18 inches of clearance above the cooktop for its 30-inch hoods; check the manual for your own model, as chimney hoods and inserts have their own clearances. Zomagas states that its 3976 under-cabinet model does not include a junction box and recommends purchasing one.
Scroll the table sideways to see every column
How We Chose These Range Hoods on Installation
We researched current listings, compared manufacturer specifications and documentation, and examined recurring patterns in customer feedback. We did not carry out hands-on testing, and nothing below is presented as measured performance data.
- Whether an installation video is published — not just a folded diagram sheet
- Whether a marking template is supplied — the step most people get wrong
- Plug fitted or hard-wired — which decides if you need an electrician
- Whether ducting is included — pipe, adaptors and vent covers
- Completeness of the parts list — published before you order, not discovered after
- Hood type — under cabinet, wall mount or insert, in ascending difficulty
- Height adjustability — for ceilings that are not standard
- Honesty about omissions — junction boxes, bulbs and carbon filters
- Support availability during the job — when you are halfway through and stuck
- Body depth and weight — because you may be holding it single-handed
The 10 Best Range Hoods for Straightforward Installation
1. Broan-NuTone PM300SS — Best for DIY

Inserts are normally the hardest hood type to fit, because the body has to be supported inside a cabinet while you connect it. The EZ1 clip system is Broan’s answer, and it is the reason this ranks first.
Broan states plainly that the insert is easy to install for both professionals and DIYers — a claim from a brand with a long enough record to be held to it.
Key Specifications
| Type | Built-in power pack insert |
|---|---|
| Install system | EZ1 clips included |
| Stated for | Both professionals and DIYers |
| Liner extension | Accommodates cabinets up to 13 inches deep |
| Width | 21 inches built |
| Max airflow | 300 CFM |
| Controls | 2-speed rocker switch |
| Noise | 3 sones |
| Optional | ADA-compliant wall remote, sold separately |
| Dimensions | 11.43″D x 21.37″W x 2.81″H |
| Rating | 4.5 out of 5 from 240 ratings |
| Best For | Fitting an insert without a contractor |
Why We Recommend It
The stainless liner extension accommodates cabinets up to 13 inches deep, which removes the most common sizing problem with inserts: a cabinet slightly deeper than the hood body.
At 21 inches it drops into narrow cabinets that will not take a 30-inch unit. An ADA-compliant wall remote is available separately if the hood sits above an awkward reach.
Pros
- EZ1 clips make an insert genuinely DIY-fittable
- Liner extension handles cabinets to 13 inches
- Broan documentation and parts network behind it
- Narrowest hood here at 21 inches
- 3 sones is a properly published noise rating
Cons
- Wall remote sold separately
- 300 CFM is modest
- Single-brightness LED
- Still an insert, so more work than under-cabinet
Best for: DIY fitters tackling an insert for the first time.
2. VIKIO HOME 30″ UC — Best Install Kit
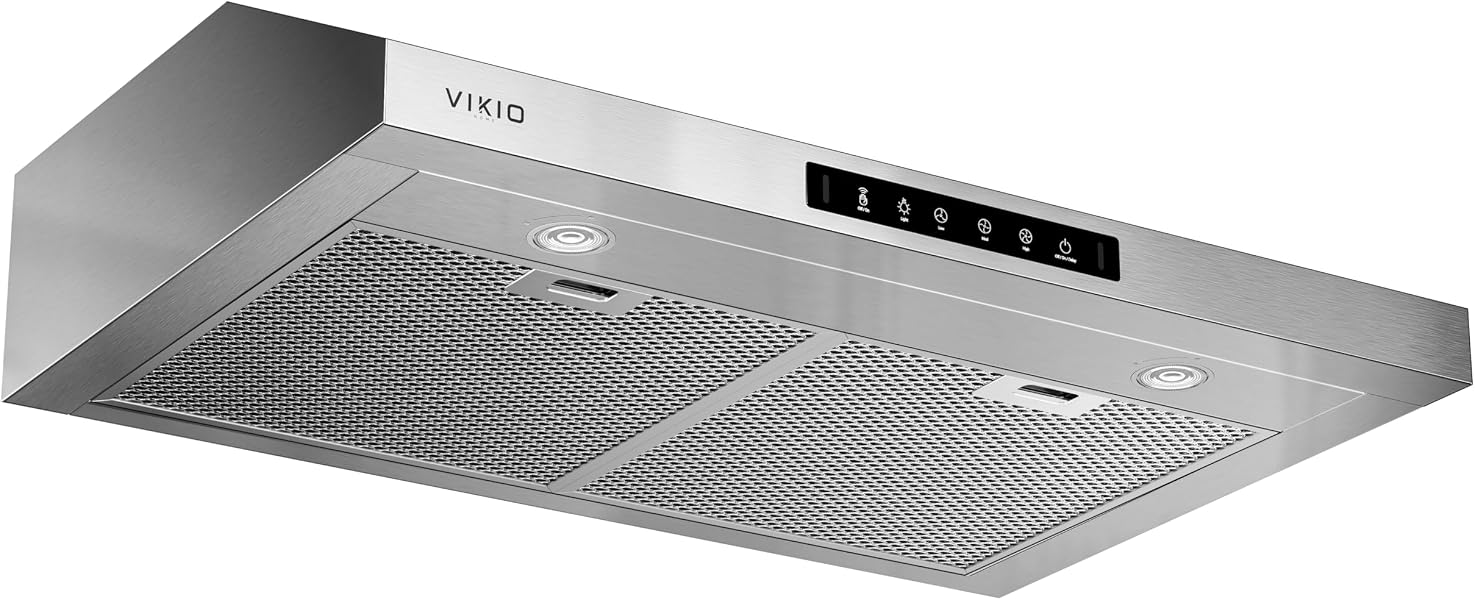
The single most common installation error is marking the fixing holes in slightly the wrong place. VIKIO includes a cardboard positioning template, which is a small thing that removes the step where most people go wrong.
The parts list is published in full — adapter, damper, filters, screws, manual, template — so you know before ordering exactly what will and will not be in the box.
Key Specifications
| Type | Under cabinet |
|---|---|
| In the box | Rectangular duct adapter with damper, 2 aluminium mesh filters, installation screw set, user manual, installation positioning cardboard |
| Template | Cardboard positioning guide for marking fixings |
| Damper | Fitted to the supplied duct adapter |
| Width | 30 inches |
| Max airflow | 900 CFM |
| Controls | Gesture sensing and touch, 3 speeds with memory |
| Auto shut-off | 3-minute delay |
| Support | 24/7 online customer service, stated |
| Dimensions | 19.75″D x 29.5″W x 6″H |
| Rating | 4.4 out of 5 from 172 ratings |
| Best For | Getting the fixing holes right first time |
Why We Recommend It
The duct adapter arrives with a damper already fitted. That is the flap that stops outside air blowing back down the duct, and it is frequently a separate purchase elsewhere.
VIKIO states 24/7 online support, which matters more during an installation than at any other time. The brand is new, with 172 ratings, so the long-term record is thin.
Pros
- Cardboard positioning template for marking fixings
- Duct adapter supplied with damper fitted
- Complete parts list published in the listing
- Stated 24/7 online support during install
- 900 CFM, the highest under-cabinet figure here
Cons
- Only 172 ratings
- No carbon filter in the box
- Gesture control can trigger accidentally
- 6-inch body needs the clearance
Best for: First-time fitters who want the marking done right.
3. FIREGAS Insert 30″ — Best Video Guide

A written diagram is often not enough for an insert, where the body has to be positioned inside a cabinet and connected in a confined space. FIREGAS publishes a video walkthrough alongside the manual.
It also arrives with a three-prong plug rather than requiring hard-wiring, which removes the part of the job that most often needs an electrician.
Key Specifications
| Type | Built-in insert |
|---|---|
| Documentation | Instruction manual plus installation guide video |
| Electrical | 120 V / 60 Hz, 3-prong plug |
| Duct outlet | 5.9-inch round, top mounted |
| Width | 30 inches |
| Max airflow | 600 CFM |
| Controls | Low, medium and high buttons |
| Dimensions | 11.5″D x 27.8″W x 10.3″H |
| Rating | 4.5 out of 5 from 272 ratings |
| Best For | Watching the job before attempting it |
Why We Recommend It
The 5.9-inch round top outlet is a standard size, so ducting and adapters are easy to source locally rather than being brand-specific.
Six hundred CFM through that outlet is a sensible match, and three mechanical buttons keep working when your hands are greasy from the job.
Pros
- Installation video published, not just a manual
- Plug fitted, no hard-wiring needed
- Standard 5.9-inch round outlet
- Simple three-button control
- 4.5 out of 5 across 272 ratings
Cons
- Still an insert, the fiddliest type to fit
- Needs a cabinet or chimney breast
- Carbon filter not included
- 272 ratings is a modest record
Best for: Anyone who wants to watch the job before starting it.
4. FIREGAS 30″ 300 CFM — Best Documented Under Cabinet

Under-cabinet hoods are the easiest type to fit: the cabinet above provides the support, so the job is marking, drilling, fixing and connecting. FIREGAS documents it with both a manual and a video.
At 4.7 inches deep the body is among the slimmest available, which makes it easier to manoeuvre into a tight gap single-handed.
Key Specifications
| Type | Under cabinet |
|---|---|
| Documentation | Instruction manual plus installation guide video |
| In the box | Recirculation sheet, air outlet, multi-layer aluminium filter |
| Connection | Hard-wired |
| Width | 30 inches |
| Max airflow | 300 CFM |
| Body | 430-grade stainless steel |
| Lighting | 2 W LED |
| Dimensions | 17.5″D x 29.9″W x 4.7″H |
| Rating | 4.4 out of 5 from 2,035 ratings |
| Best For | A straightforward first installation |
Why We Recommend It
With 2,035 ratings this is the most-reviewed hood in this list, so the installation experience it describes has been tested by a lot of people.
One thing to plan for: this is hard-wired rather than plug-fitted. If there is no existing supply in the cabinet, that part of the job needs an electrician regardless of how good the video is.
Pros
- Manual and installation video both published
- 2,035 ratings, the most here
- Slim 4.7-inch body is easy to manoeuvre
- Recirculation sheet and outlet included
- 430-grade stainless steel
Cons
- Hard-wired rather than plug-fitted
- Charcoal filter not included
- Two speeds only
- 300 CFM suits light to moderate cooking
Best for: A straightforward under-cabinet fit with good documentation.
5. COMFEE’ F13 30″ — Most Complete Box

Installations stall over small parts. A missing baffle, no lamp holder, the wrong screws — each means stopping and driving to a hardware store. COMFEE’ includes all of them.
Both filters are supplied too, including the activated carbon composite, so the hood is fully operational the moment it is fixed to the wall.
Key Specifications
| Type | Under cabinet |
|---|---|
| In the box | Range hood, aluminium filter, aluminium and activated carbon composite filter, E26 lamp holder, screw pack, long baffle |
| Documentation | Filter replacement video published |
| Width | 30 inches |
| Max airflow | 200 CFM |
| Fan | 2 speeds |
| Body | Stainless steel |
| Dimensions | 18″D x 29.8″W x 5.5″H |
| Rating | 4.4 out of 5 from 1,799 ratings |
| Best For | Finishing the job in one afternoon |
Why We Recommend It
COMFEE’ also publishes a video specifically on replacing the F13’s filter, which is the maintenance task owners actually need shown rather than described.
Two hundred CFM is the lowest airflow in this list. This is the right choice for a quick, complete, uncomplicated fit in a modest kitchen, not for heavy cooking.
Pros
- Every small part supplied, including the lamp holder
- Both filters included, carbon as well as grease
- Filter replacement video published
- 1,799 ratings at 4.4 out of 5
- Slim 5.5-inch body
Cons
- 200 CFM, the lowest here
- Bulb itself not included
- Two speeds only
- Not suited to heavy frying
Best for: Fitting a hood start to finish in a single afternoon.
6. VIKIO HOME 30″ Wall — Best Wall Mount Guide
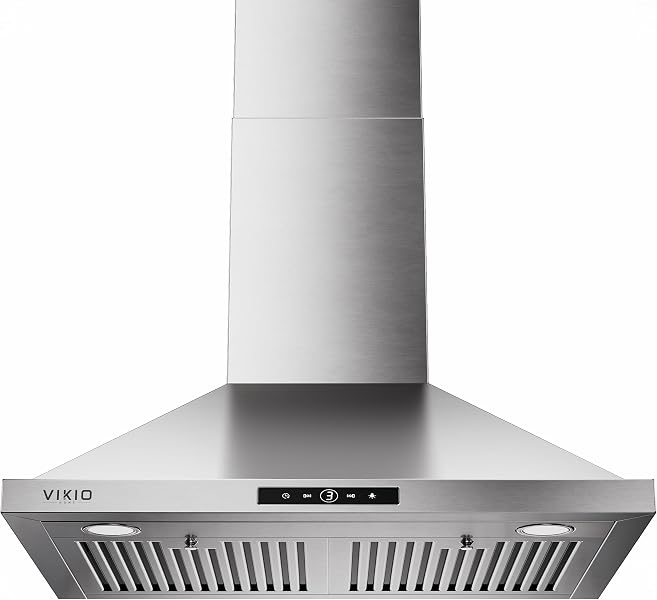
Wall-mount hoods carry their own weight on the wall rather than borrowing support from a cabinet, so the fixings have to be right and the chimney has to line up. A video is worth considerably more here than on an under-cabinet unit.
VIKIO publishes exactly that, titled for the wall-mount models specifically rather than a generic clip.
Key Specifications
| Type | Wall mount chimney |
|---|---|
| Documentation | How to install the VIKIO HOME wall-mounted range hood, published video |
| Width | 30 inches |
| Max airflow | 580 CFM |
| Motor | Dual-sided intake, stated 20 per cent more airflow |
| Noise | 40 dBA at low, under 65 dBA at high |
| Body | 430-grade brushed stainless, pyramidal |
| Filters | 2 dishwasher-safe stainless permanent |
| Dimensions | 19.68″D x 29.3″W x 41″H |
| Rating | 4.4 out of 5 from 269 ratings |
| Best For | A first wall-mount chimney installation |
Why We Recommend It
At 41 inches overall it needs less ceiling height than most chimney hoods, which widens the range of kitchens it will physically fit.
The published noise figures are the clearest in this list at 40 dBA low and under 65 dBA high, and the permanent stainless filters never need replacing.
Pros
- Install video published for wall-mount models
- 41 inches, shorter than most chimney hoods
- Clearest published noise figures here
- Dishwasher-safe permanent filters
- 430-grade brushed stainless
Cons
- Wall mounting is harder than under-cabinet
- 269 ratings is a thin record
- Carbon filter sold separately
- Needs the ceiling height checked first
Best for: A first attempt at a wall-mounted chimney hood.
7. Zomagas 24″ Wall — Best Ducting Included

Ducting is the part of the job people forget to order. Almost every hood here expects you to buy the pipe separately; Zomagas puts a six-inch exhaust pipe in the box.
It also arrives with a three-prong plug rather than needing hard-wiring, so a ducted install needs no electrician if a socket is within reach.
Key Specifications
| Type | Wall mount chimney |
|---|---|
| Ducted mode | 6-inch exhaust pipe included in the box |
| Ductless mode | Converts with CFZMG01 carbon filter, sold separately |
| Width | 24 inches |
| Max airflow | 450 CFM |
| Fan | 3 speeds |
| Electrical | 120 V / 60 Hz, 3-prong plug |
| Filters | 2 stainless steel, dishwasher safe |
| Dimensions | 18.3″D x 23.6″W x 36.3″H |
| Rating | 4.5 out of 5 from 429 ratings |
| Best For | Ducted installs with nothing left to source |
Why We Recommend It
Zomagas names the ductless conversion filter as CFZMG01, so whichever mode you fit it in, the parts are properly identified.
Twenty-four inches suits a narrow hob properly, where a 30-inch hood would overhang. The chimney is 36.3 inches tall, so measure from the hob to the ceiling before ordering.
Pros
- Six-inch exhaust pipe included
- Plug fitted rather than hard-wired
- Carbon filter named as CFZMG01
- Fits 24-inch cooktops properly
- 4.5 out of 5 across 429 ratings
Cons
- 36.3 inches tall, needs clearance
- Carbon filter sold separately
- 24 inches is too narrow for most ranges
- Wall mounting is harder than under-cabinet
Best for: Ducted installs where the pipe should come with the hood.
8. COSMO Vista 30″ — Best for Odd Ceilings

Fixed-height chimney hoods either fit your ceiling or they do not. COSMO’s adjusts across nearly 14 inches of range, which covers most rooms including the awkward ones.
That flexibility is worth more than it looks during a renovation, when the finished floor and ceiling heights are not always what the drawings said.
Key Specifications
| Type | Wall mount chimney |
|---|---|
| Adjustable height | 25.6 to 39.4 inches |
| Width | 30 inches |
| Max airflow | 380 CFM |
| Fan | 3 speeds, soft touch controls |
| Filters | ARC-FLOW permanent, dishwasher safe, never need replacing |
| Lighting | Energy-efficient 2 W LED |
| Electrical | 120 V |
| Warranty | 2-year limited parts |
| Support | US-based customer support, stated |
| Rating | 4.4 out of 5 from 1,965 ratings |
| Best For | Rooms with unusually high or low ceilings |
Why We Recommend It
The ARC-FLOW filters are permanent and dishwasher safe, so there is no consumable filter to order at install time or ever.
COSMO backs it with a two-year limited parts warranty and US-based support — the longest cover in this list, and useful if something is missing from the carton.
Pros
- Chimney adjusts 25.6 to 39.4 inches
- 2-year limited parts warranty, longest here
- US-based support stated
- Permanent filters, no consumables to order
- 1,965 ratings at 4.4 out of 5
Cons
- 380 CFM is mid-range
- Soft touch controls rather than buttons
- Carbon filter not included
- Wall mounting is harder than under-cabinet
Best for: Renovations where the ceiling height is not yet settled.
9. FIREGAS 36″ 300 CFM — Easiest Electrical

Hard-wiring is the step that turns a DIY afternoon into a booked appointment. This arrives with a plug fitted, so if there is a socket inside the cabinet the electrical side is done.
The box also contains the square-to-round outlet adaptor and vent cover, which are the two ducting parts most often missing.
Key Specifications
| Type | Under cabinet |
|---|---|
| Connection | Comes with a plug |
| In the box | Square to round outlet adaptor, air outlet, vent cover |
| Width | 36 inches |
| Max airflow | 300 CFM |
| Motor | Brushless DC |
| Noise | Under 45 dB at high speed |
| Lighting | 1.5 W LED |
| Controls | Button control |
| Warranty | 1 year limited |
| Dimensions | 18.9″D x 35.2″W x 5.3″H |
| Rating | 4.2 out of 5 from 501 ratings |
| Best For | Avoiding an electrician entirely |
Why We Recommend It
Under 45 dB at high speed from a brushless DC motor is the quietest published figure in this list.
Three hundred CFM across 36 inches is modest, and the one-year warranty is short. This is chosen for the ease of fitting rather than raw performance.
Pros
- Plug fitted, no hard-wiring required
- Outlet adaptor and vent cover included
- Under 45 dB at high speed, quietest here
- 36-inch coverage in a slim 5.3-inch body
- 501 ratings is a reasonable record
Cons
- 300 CFM is low for 36 inches
- 1-year warranty only
- Carbon filter not included
- Needs a socket inside the cabinet
Best for: Installs where hiring an electrician is the sticking point.
10. magicin 30″ Convertible — Fastest Swap

Replacing a hood that already exists is a much smaller job than fitting one from scratch: the duct, the supply and the fixings are already there. magicin leads its listing on exactly that speed.
Three speeds and ducted or ductless conversion match hoods costing a good deal more.
Key Specifications
| Type | Under cabinet |
|---|---|
| Install | Clear instructions, quick mounting emphasised by the manufacturer |
| Width | 30 inches |
| Max airflow | 200 CFM |
| Fan | 3 speeds |
| Modes | Ducted and ductless convertible |
| Lighting | LED |
| Body | Brushed stainless steel |
| Dimensions | 19.69″D x 29.7″W x 5.43″H |
| Rating | 3.7 out of 5 from 12 ratings |
| Best For | Replacing an existing 30-inch hood quickly |
Why We Recommend It
At 5.43 inches deep it slots into the same gap most 30-inch hoods occupy, which is what makes a like-for-like swap straightforward.
The evidence behind it is very thin and should be stated plainly: 12 ratings at a 3.7 average, the lowest figure in this list. It is included for the swap case and for buyers whose only constraint is price.
Pros
- Quick mounting emphasised with clear instructions
- Three speeds at the lowest price here
- Ducted and ductless convertible
- Slim 5.43-inch body suits a like-for-like swap
- Brushed stainless finish
Cons
- Only 12 ratings, far too few to judge
- 3.7 average, lowest here
- 200 CFM ties for lowest airflow
- No parts network behind it
Best for: Swapping out an existing hood on a budget.
Under Cabinet or Wall Mount?
The choice that decides how hard the installation actually is.
| Feature | FIREGAS 30″ Under Cabinet | VIKIO HOME 30″ Wall Mount |
|---|---|---|
| Support | Borrowed from the cabinet above | Carried entirely by the wall |
| Fixing accuracy needed | Moderate | High |
| Documentation | Manual and video | Wall-mount install video |
| Height to plan | 4.7-inch body | 41 inches overall |
| Electrical | Hard-wired | Hard-wired |
| Typical difficulty | Easiest hood type | Hardest of the two |
| Main advantage | Fastest, most forgiving fit | Works where there is no cabinet |
| Main drawback | Needs a cabinet above the hob | Ceiling height governs, fixings critical |
Choose under cabinet if: there is a cabinet above the hob and you want the simplest possible installation.
Choose wall mount if: there is no cabinet, or the hood is meant to be seen — and follow the video closely.
Plug Fitted or Hard-Wired?
The single specification that decides whether you need to book a trade.
| Feature | FIREGAS 36″ Under Cabinet | FIREGAS 30″ Under Cabinet |
|---|---|---|
| Electrical connection | Plug fitted | Hard-wired |
| Electrician needed | Only if no socket exists | Usually yes |
| Ducting parts included | Adaptor, outlet, vent cover | Recirculation sheet, air outlet |
| Width | 36 inches | 30 inches |
| Rated airflow | 300 CFM | 300 CFM |
| Rating | 4.2 from 501 | 4.4 from 2,035 |
| Main advantage | Whole job stays DIY | Tidier, no visible cable |
| Main drawback | Needs a socket in the cabinet | Needs a supply run and a junction box |
Choose the plug-fitted hood if: there is a socket inside the cabinet and you want to finish the job yourself.
Choose the hard-wired hood if: you want no visible cable and are already having electrical work done.
Best Alternatives
| Alternative | Why Consider It | Better For | Main Trade-Off |
|---|---|---|---|
| Zomagas 24″ Wall | Six-inch exhaust pipe included | Ducted installs | Only 24 inches wide |
| COSMO Vista 30″ | Chimney adjusts 25.6 to 39.4 inches | Unusual ceiling heights | Soft touch controls |
| COMFEE’ F13 30″ | Every small part in the box | One-afternoon fits | 200 CFM only |
| Broan-NuTone PM300SS | EZ1 clips for DIY insert fitting | Narrow cabinets | 300 CFM, 21 inches |
| magicin 30″ | Fastest stated setup | Like-for-like swaps | Only 12 ratings |
How to Install a Range Hood, Step by Step
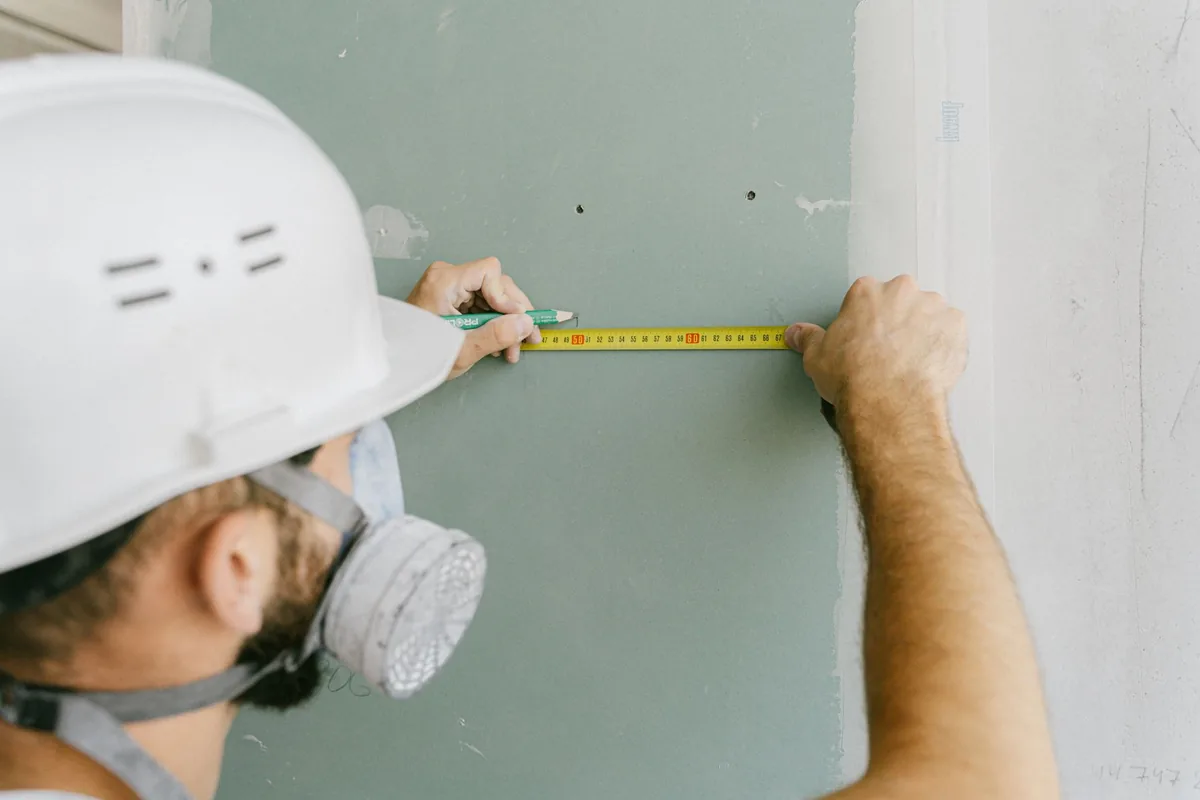
1. Measure three things before you order. The width of the cooktop, because a hood narrower than the hob leaves the outer burners uncovered and that is where capture fails first. The clearance between the cabinet base and the hob, because bodies here run from 4.7 to 6 inches deep. And for a chimney hood, the height from hob to ceiling — the VIKIO needs 41 inches, the Zomagas 36.3, and COSMO’s adjusts from 25.6 to 39.4.
2. Decide ducted or ductless now, not later. Ducted needs a route to an exterior wall and the pipe to run through it. Ductless needs a charcoal filter and, on convertible hoods, a recirculation sheet. FIREGAS includes the sheet but not the filter. Zomagas includes the pipe. COMFEE’ includes the filter. Nobody includes all three.
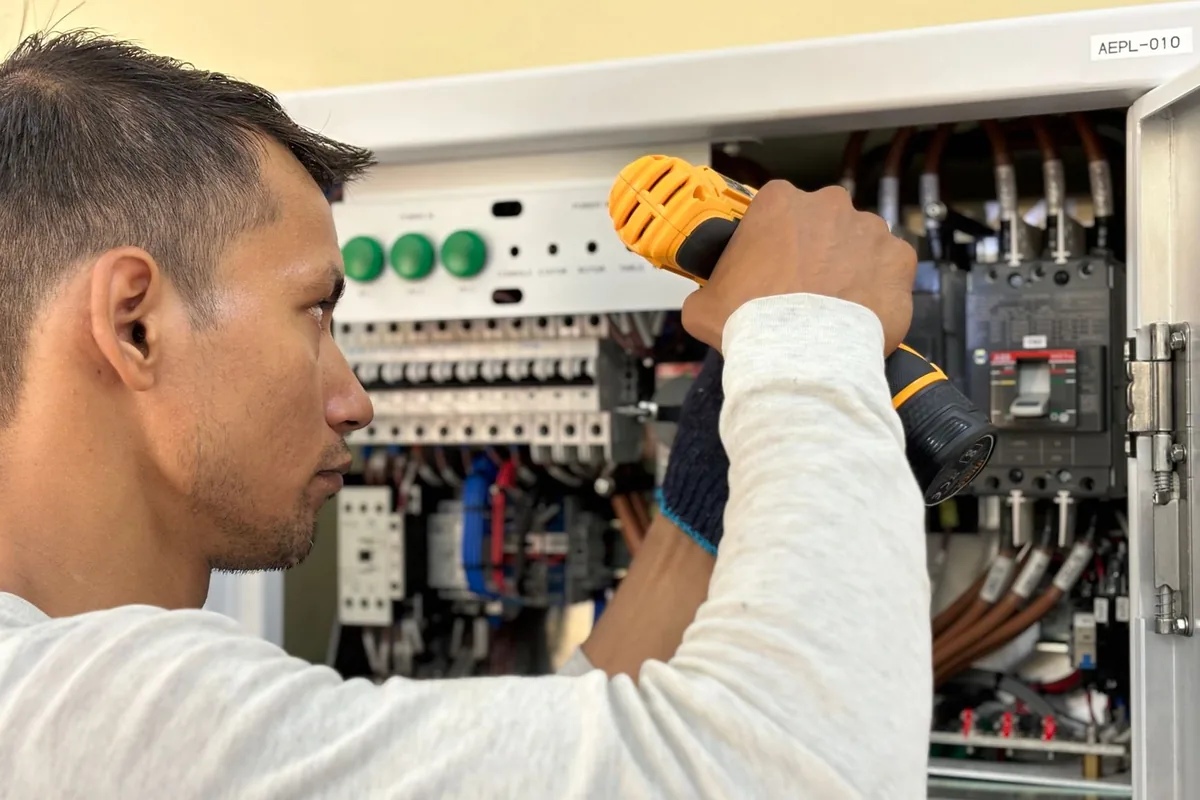
3. Isolate the power at the breaker. Not at the wall switch — at the consumer unit. Confirm it is dead before touching any existing wiring. If the hood is hard-wired and there is no supply in the cabinet, stop here and book an electrician; that part of the job is not a DIY task in most jurisdictions.
4. Mark the fixings using the template if you have one. VIKIO supplies a cardboard positioning guide, which is the single most useful item in any of these boxes. Without one, measure twice from a fixed reference such as the cabinet edge rather than from the wall, which is rarely square. Broan specifies at least 18 inches above the cooktop.
5. Fix the body, supporting its weight. Under-cabinet hoods screw up into the cabinet base and are light enough to hold one-handed at 4.7 inches deep. Wall-mount chimneys need fixings rated for the load into masonry or a stud, not plasterboard alone. Inserts need clips or brackets — Broan’s EZ1 clips are designed exactly for this moment.
6. Connect the ducting and fit the damper. Use the shortest, straightest run you can; every bend costs airflow. The damper is the flap that stops cold outside air blowing back down the duct. VIKIO supplies one already fitted to its adapter; on many hoods it is a separate part.
7. Make the electrical connection. If the hood has a plug, this is done. If it is hard-wired, the connections must be enclosed in a junction box — Zomagas states plainly that no junction box is included with its 3976 and recommends buying one. Never leave a hard-wired connection outside an enclosure.
8. Fit the filters and the bulb, then test. Grease filters clip in; charcoal filters sit behind them on ductless installs. Broan states the bulb is not included and specifies type A19 at 75 W maximum. Restore power and test every fan speed and the light before putting tools away.
How to Choose a Range Hood You Can Actually Fit
Pick the Hood Type by How Much Work You Want
Under-cabinet hoods are the easiest, because the cabinet takes the weight and the fixings are into wood rather than masonry. Wall-mount chimneys need accurate fixings and a ceiling height check. Inserts are fiddliest, though EZ1 clips on the Broan make that type far more approachable than it usually is.
Look for a Plug Before Anything Else
A plug-fitted hood keeps the whole job in DIY territory as long as a socket exists in the cabinet. The FIREGAS 36-inch, the FIREGAS insert and the Zomagas 24-inch all come with plugs. A hard-wired hood usually means booking an electrician, whatever the instructions say.
Value a Template Over a Thicker Manual
Marking the fixing holes is where most installations go wrong, and a cardboard positioning guide removes that risk entirely. VIKIO is the only manufacturer here that supplies one. It is a trivially cheap item that saves the most expensive mistake in the job.
Check Whether Ducting Is Included
Most hoods expect you to buy the pipe. Zomagas includes a six-inch exhaust pipe; FIREGAS includes a square-to-round adaptor and vent cover. Read the package contents carefully, because discovering the ducting is missing halfway through a Saturday is the classic way this job stalls.
Prefer Manufacturers Who Publish Video
FIREGAS publishes installation videos for both its insert and its under-cabinet hood; VIKIO publishes one for wall-mount models; COMFEE’ publishes one on filter replacement. A video shows the awkward moments a diagram flattens out, and its existence suggests a manufacturer that expects owners to fit these themselves.
Match the Chimney to the Ceiling
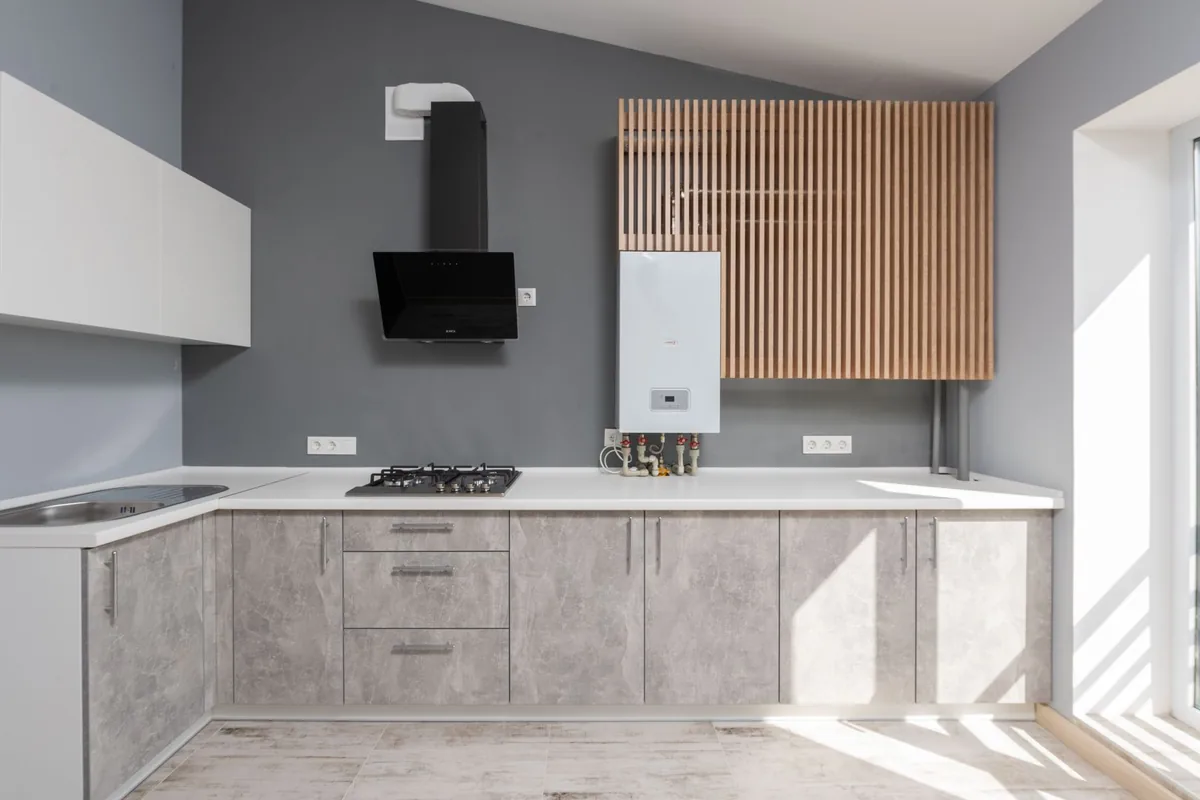
Fixed-height chimneys either fit or they do not. The VIKIO is 41 inches, the Zomagas 36.3, the IKTCH chimney hoods taller still. COSMO’s Vista adjusts from 25.6 to 39.4 inches, which is the safest choice when the ceiling height is unusual or not yet finalised.
Read What Is Deliberately Not Included
Zomagas states no junction box is supplied and recommends buying one — that is a manufacturer being honest, and it is a real cost and a real safety requirement. Broan states the bulb is not included. FIREGAS states the charcoal filter is not. Add all of it to the order at the same time.
Consider Weight and Depth if Fitting Alone
A 4.7-inch under-cabinet body can be held in one hand while you start a screw. A 36-inch chimney hood cannot. If you are fitting without a second pair of hands, the slim under-cabinet models from FIREGAS and Zomagas are the realistic options.
Common Range Hood Installation Mistakes
- Not isolating at the breaker. Switching the hood off at the wall is not the same as cutting the supply.
- Buying a hood narrower than the hob. The outer burners are exactly where capture fails first.
- Mounting too low. Broan specifies at least 18 inches above the cooktop; closer is a heat risk and does not improve capture.
- Forgetting the ducting. Most hoods do not include the pipe, and the job stops without it.
- Leaving a hard-wired connection outside a junction box. Zomagas states plainly that one is needed and not supplied.
- Using too many bends in the duct run. Every bend costs airflow; the shortest straight run always wins.
- Measuring from the wall rather than the cabinet. Walls are rarely square; the cabinet edge is the more reliable reference.
- Fixing a chimney hood into plasterboard alone. Wall-mount hoods carry their own weight and need masonry or a stud.
Who Can Fit a Range Hood Themselves?
This is a realistic DIY job if:
- You are replacing an existing hood — duct, supply and fixings are already in place
- The hood has a plug and there is a socket — which removes the electrical work entirely
- It is an under-cabinet model — the cabinet takes the weight and the fixings go into wood
- The manufacturer publishes a video — FIREGAS, VIKIO and COMFEE’ all do
- You are fitting ductless — no exterior wall penetration is needed at all
- You have a second pair of hands — which matters more than any tool for a wide hood
When Should You Call a Professional?
When the hood is hard-wired and no supply exists in the cabinet, because bringing a circuit to it is electrical work. When ducting has to be cut through an exterior wall, which affects the building fabric and sometimes needs permission. When the hood is a heavy wall-mount chimney and the wall construction is uncertain. And whenever you are unsure — a hood that falls, or a connection that overheats above a hob, is a much larger problem than the cost of an hour’s labour.
Frequently Asked Questions
How high should a range hood be above the cooktop?
Broan specifies at least 18 inches above the cooking surface for its 30-inch hoods, and that is a sound general minimum. Chimney hoods and inserts have their own clearances, so check the manual for your model. Mounting closer does not improve capture and creates a genuine heat risk.
Can I install a range hood myself?
Usually yes for an under-cabinet hood with a plug, particularly if you are replacing an existing one. The job becomes professional work when the hood is hard-wired and no supply exists, when ducting must be cut through an exterior wall, or when a heavy chimney hood is going onto a wall of uncertain construction.
Do range hoods come with ducting?
Rarely. Of the ten hoods here only the Zomagas 24-inch includes a six-inch exhaust pipe. FIREGAS supplies a square-to-round adaptor and vent cover with its 36-inch model, and VIKIO supplies a duct adapter with a damper fitted. For everything else, order the ducting separately at the same time.
What is a damper and do I need one?
It is a flap in the duct that opens when the fan runs and closes when it stops, preventing cold outside air blowing back into the kitchen. On a ducted install you do need one. VIKIO supplies its duct adapter with a damper already fitted; on many hoods it is a separate part to buy.
Do I need a junction box?
For any hard-wired hood, yes — the connections must be enclosed. Zomagas states plainly that no junction box is included with its 3976 under-cabinet hood and recommends buying one to enclose the wire connections. Never leave a hard-wired connection exposed, particularly inside a cabinet above a heat source.
Which type of range hood is easiest to install?
Under-cabinet, by a clear margin. The cabinet above provides the support, the fixings go into wood rather than masonry, and the slim 4.7-inch bodies can be held one-handed. Wall-mount chimneys need accurate load-bearing fixings; inserts must be positioned inside a cabinet, which is fiddliest of all.
How long does it take to fit a range hood?
A like-for-like under-cabinet replacement where the duct and supply already exist is often an afternoon. A new installation requiring a duct run and an electrical supply is a considerably larger job, frequently spread across two days and involving a trade. The variable is almost never the hood itself.
What should I check the moment it is installed?
Restore power and test every fan speed and the light before you put the tools away. Check the damper opens when the fan runs. Confirm the filters are seated properly and that the hood is level. Finding a fault while the ladder is still up is far easier than discovering it a week later.
Final Verdict
EZ1 clips and a liner extension make an insert — normally the hardest type — genuinely fittable without a contractor.
The only hood here supplying a cardboard positioning template, plus a duct adapter with the damper already fitted.
Lamp holder, screw pack, baffle and both filters included, so nothing stops the job halfway through.
The instructions matter, but the specification matters more. A hood with a plug, a marking template and a published video is a different job from a hard-wired chimney with a folded diagram sheet, and that difference is visible in the listing before you order.
So work backwards from the job you are willing to do. Measure the hob, the cabinet clearance and the ceiling. Decide ducted or ductless. Check for a plug. Then read the package contents for what is deliberately missing — the junction box, the bulb, the charcoal filter, the ducting — and order all of it together. Do that and the installation itself is usually the easy part.